
——————————————————————————————————————
GaugeSwitcher is a very easy to use program developed to help Logitech or Saitek FIP (Flight Instrument Panel) users to quickly switch between multiple FSX Times Gauges (say from C172SP to B58 to Mooney Bravo to RAS Duke or vice versa) to match with the aircraft being used in FSX, FSX-SE and P3D.
NOTE THAT:
1) GaugeSwitcher will not run if NO FSX Times Gauge is present. Other than that, it can handle up to 60 Profiles mixed with non-FSX Times Gauges.
2) GaugeSwitcher V8 supports Logitech’s 64-bit drivers up to version 8.0.132.0 and Saitek’s 64-bit drivers up to version 7.0.47.1.
3) GaugeSwitcher v9 further extends the support to Logitech’s 8.0.150.0.
4) Feature-wise, both v8 and v9 work identically.
5) Recommended drivers are the earlier 8.0.132.0, even for Prepar3Dv4. If you are currently using this version with no issues, there is NO NEED to update the drivers to newer ones.
========================================
INSTALLATION
1) Unzip the program package.
2) Put the “GaugeSwitcher.exe“ into the:
- “C:\Program Files (x86)\Saitek\ProFlight FSX Plugin” folder if you are using the Logitech Drivers; or
- “C:\Program Files (x86)\Logitech\FSX Plugin” folder if you are using the Saitek Drivers.
3) Create two shortcuts of the “GaugeSwitcher.exe” and put them in the “Start Menu” and “Task Bar”, so that the program can be accessed easily.
4) Run GaugeSwitcher.
5) The very first Gauge Profile based on the current FIP gauge setup will be created automatically.
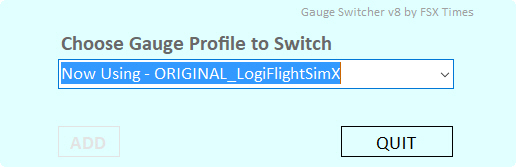
Note that the name of the first Profile could be
- “ORIGINAL_LogiFlightSimX” as shown above if the Logitech Drivers are used; otherwise,
- “ORIGINAL_SaiFlightSimX” if the system is using the Saitek Drivers.
For demonstrations, Logitech version will be generally used in this guide.
++++++++++++++++++++++++
The switching of FIP gauges by the GaugeSwitcher is mainly carried out thru the different Profiles created by the program itself or by users manually.
_
By using the program’s DUPLICATION, ADDITION and DELETION features described below, one can easily create and manage up to 60 different Gauge Profiles for quick switching.
========================================
PROFILE DUPLICATION
Duplication of Profiles is sometimes needed.
- For example, the name of the very first Profile (“ORIGINAL_LogiFlightSimX” or “ORIGINAL_SaiFlightSimX”) is a bit vague. It is therefore a good practice to create (or more precisely, to duplicate) a new Profile with a clearer name for easy recognition in future switching.
- Also, since this GaugeSwitcher program has no rename function, Profile Duplication can be used to create new Profiles with different names, say after entered a wrong Profile name or when another name is desired.
++++++++++++++++++++++++
1) Run GaugeSwitcher, if it has been closed after the installation.
2) Click on the dimmed [ADD] Button in the lower left hand corner of the utility.
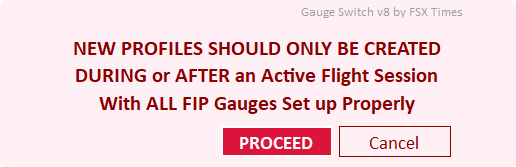
3) Ignore the WARNING page and click [PROCEED] to continue.
4) Enter a name desired (e.g. Cessna_C172SP) in the space provided.
5) Click [CONFIRM] to create.
6) Two Profiles are now listed on the drop-down menu.
++++++++++++++
Switching between the “ORIGINAL_LogiFlightSimX” and “C172SP” Profiles is now possible. However, as the two Profiles were created from the same FIP setup actually, switching between them will not have any noticeable difference.
NOTE again that Profile Duplication should be used ONLY WHEN
– NO new gauges are added; AND
– NO changes are made to the “LogiFlightSimX.xml” (or “SaiFlightSimX.xml”)
========================================
PROFILE ADDITION
When new gauges have been installed or the “LogiFlightSimX.xml” (or “SaiFlightSimX.xml”) was modified — such as after deleting some of the gauges, or after changing the order on which FIPs the gauges are displayed — Profile ADDITION can be used to create new Profiles to reflect the changes in FIP setup.
In general, the Profile Addition process is more or less the same as the Profile Duplication process described above, except that the Profile ADDITION process MUST BE CARRIED OUT DURING or AFTER an active flight session with all FIP Gauges set up properly. Otherwise, errors will occur.
++++++++++++++++++++++++
1) After installing new Gauges or after modifying “LogiFlightSimX.xml” (or “SaiFlightSimX.xml”)
2) Start up FSX or FSX-SE or P3D.
3) Load a flight session. (Step 3 and 4 are interchangeable)
4) Press up/down buttons on each FIP to select the correct gauge to display.
5) Run GaugeSwitcher.
6) Click on the dimmed [ADD] Button in the lower left hand corner of the utility.
7) Click [PROCEED] to leave the WARNING page.
8) Enter a name desired (e.g. Baron_B58) in the space provided.
9) Click [CONFIRM] to create.
++++++++++++++
In practice, the Profile Addition process (from Step 6 to 9) is identical to the Profile Duplication process described earlier.
However, since the “SaiFlightFip.xml” (which stores the connecting information of which gauges to be displayed on which FIPs) will update itself during an active flight session. The extra Steps from 2 to 5 are therefore necessary to ensure the saving of the updated FIP connecting information to the new Profile.
Fail to carry out steps 2 to 4 above, Profiles created will not contain information about which gauges to be displayed on which FIP. In other words, errors occur.
Again, when creating new Profile after
– New gauges are added, OR
– Changes have been made to “LogiFlightSimX.xml” (or “SaiFlightSimX.xml”)
– The Profile ADDITION process MUST BE CARRIED OUT only DURING or AFTER a flight session in which all desired FIP gauges have been set up correctly.
========================================
PROFILE DELETION
1) Run GaugeSwitcher.
2) Select the Profile to delete from the drop-down menu.
3) Move cursor to the dimmed [DEL] Button in the lower left hand corner.
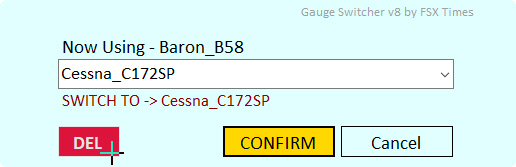
4) Click [CONFIRM] to delete.
++++++++++++++
Note that current Profile being used cannot be deleted.
========================================
PROFILE SWITCHING
Once Profiles were created, switching can be carried out at ANY TIME, no matter if FSX, FSX-SE or P3D is running, or if the flight simulator is in a flight session or not. And switching between them is intuitive.
++++++++++++++++++++++++
1) Run GaugeSwitcher.
2) Select the Gauge Profile desired.
3) Then click [CONFIRM] to switch.
++++++++++++++
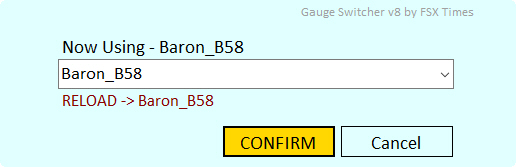
If needed, one can also select the current Profile and [CONFIRM] to load it again.
========================================
That’s all. By using the program’s DUPLICATION, ADDITION and DELETION features described above, one can easily create and manage up to 60 different Gauge Profiles for quick switching.
Contact me if further help is needed.
Tom Tsui
FSX Times
